DIY – FALL FAMILY TREE
| Check out Laurie Cinotto of La La Laurie’s beautiful DIY Fall Tree project….’When I designed this project, I was thinking it would be an alternative to having framed wedding photos of the parents on display at a wedding. I just took it a few generations further! It could be easily adapted for any season just by changing the leaf colors. ‘
Supplies: An assortment of coordinating decorative paper (double sided) Color copies of family wedding photos (two copies of each image) A large branch in heavy vase….or a tree Embroidery floss or string Clear tape Glue stick Scissors or X-acto knife Leaf craft punch |
![]()
 |
![]()
|
Instructions:
1, Begin by punching an assortment of leaves from your paper. You’ll need about 8 – 10 per strand.
2. Cut 10 lengths of floss, ranging from 2 – 3 feet each.
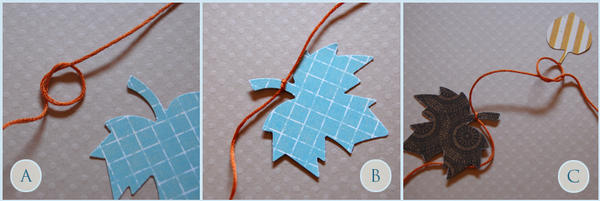
3. Tie a loose knot about four inches from the end of the floss. (see figure A). Insert the stem of one of the leaves into the knot and tighten the thread. (see figure B)
4. Make another knot four inches down and add another leaf. (see figure C)
5. Continue down the string, adding a leaf every four inches. At one point on the strand, leave an 8 inch gap between two of the leaves (a picture will be inserted here later).
6. Repeat the above steps and add leaves to all your lengths of floss, leaving one 8 inch gap for a photo on each strand.
|
![]()
 |
![]()
| 7. Gather a collection of family wedding photos, scan and print out two copies of each image on a heavy photo paper. Each picture should be roughly two inches wide. (see figure D)
8. Download the picture frame PDF and cut them out using your X-acto knife or scissors. There are two styles to chose from. Use one or both. (Download the PDF here)! |
![]()
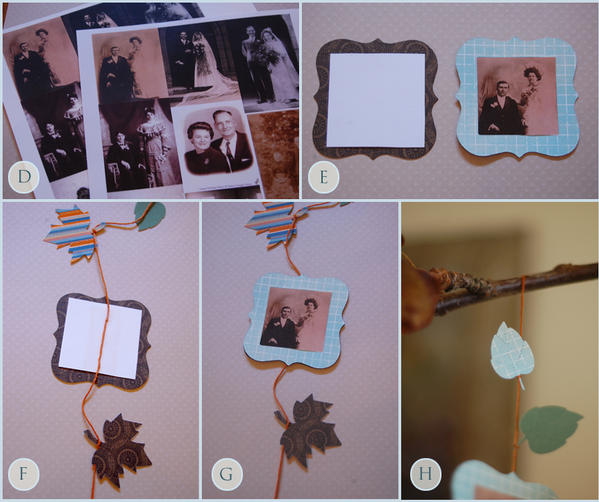 |
![]()
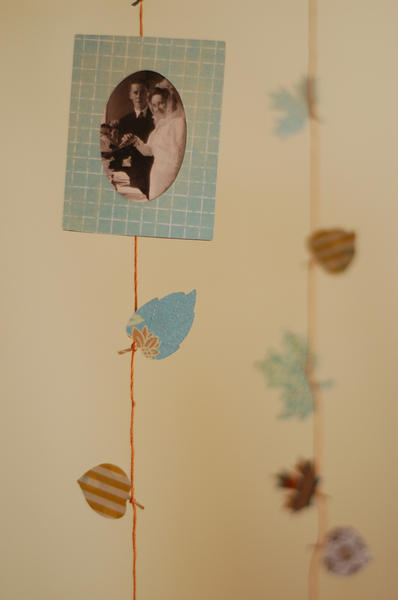
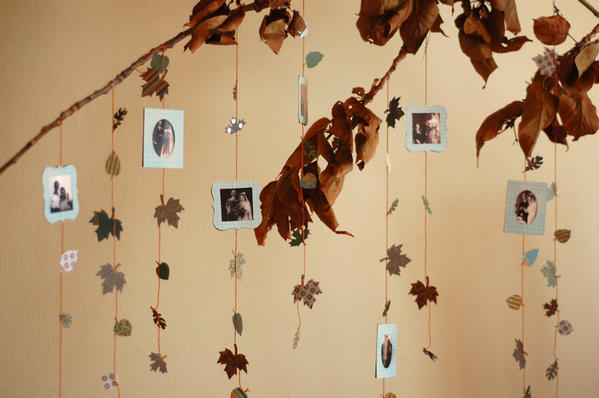
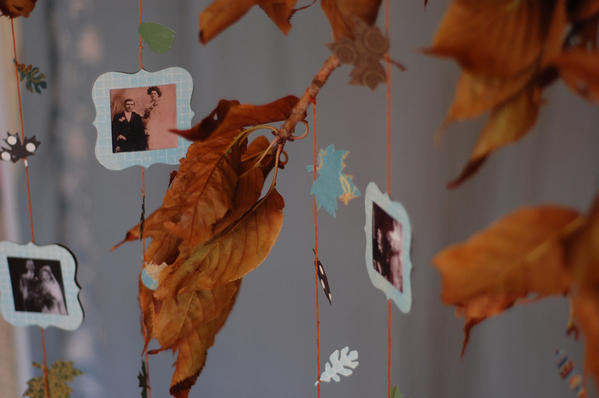
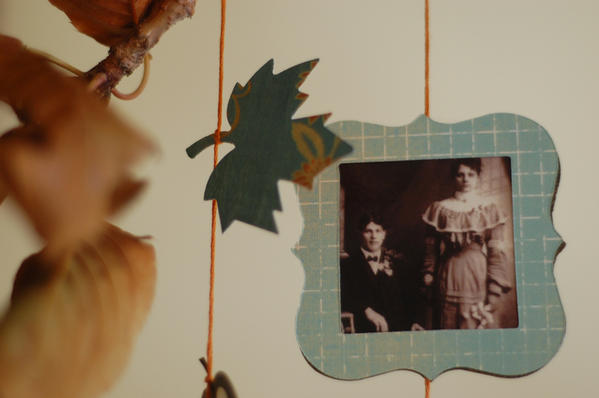
| 11. Take two identical pictures, and two identical frames. Center one of the pictures in the frame, and glue the frame onto the picture. Repeat with second picture. (see figure E – left side is what the back of your framed picture should look like, right side is the front) 12. Take one of your leaf strands and find the 8 inch gap you left for your picture frame. Lay one of your framed pictures face down, with the strand on top. Tape the floss down to the center of the back of the framed picture. (see figure F) Glue the framed pictures back to back, with the floss sandwiched in between. (see figure G) 13. Repeat steps 11 and 12 for your remaining frames and photos. 14. Tie the strands to a branch contained in a large heavy vase, or from the limb of a tree. (see figure H). Space them several inches apart, so the pictures can spin freely. |
![]()
 |
![]()
 |
![]()
 |
![]()
 |
![]()
 |
![]()
| Thanks Laurie for sharing another wonderful DIY with us, you ALWAYS amaze us with your talent…xoxo! |
![]()