DIY – WEDDING CAKE CHANDELIER
| DIY contributor, Laurie Cinotto of La La Laurie, is here to share her fun and beautiful DIY – Wedding Cake Chandelier with us…….you are going to love this project and Laurie is simply AMAZING….now let’s get started….Thanks SO much Laurie……Enjoy Everyone!
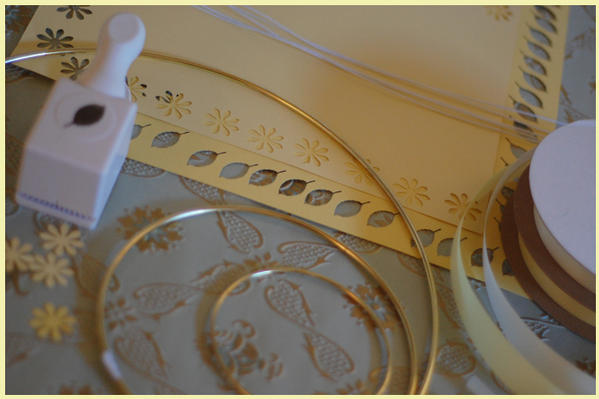
Supplies: Satin acetate ribbon – 1′ wide (Satin acetate ribbon is available at most craft stores or florists. Generally, it’s very inexpensive sold in a bolt of 100 yards. 3 metal craft rings small, medium and large. (I used 14′, 9′ and 5′ in diameter) A couple of colors of card stock White fabric coated wire – 18′ long (Available in the floral section of craft stores) Flower shaped craft punch (Save on Crafts has an excellent craft punch selection, so does Martha Stewart Crafts) Leaf shaped craft punch Hot glue gun and glue sticks Scissors Wire cutters |
![]()
 |
![]()
| Getting started: To calculate the amount of ribbon you’ll need you need to first determine the circumference of your rings. To do this, measure the diameter of each ring, and multiply it by 3.14 (then round off the number) 19′ x 3.14 = 44′ 15′ x 3.14 = 29′ 5′ x 3.14 = 16′ Total = 89′ For each circumference inch, you will need 14′ of ribbon. All three circle circumferences totaled 89 inches. 89′ x 14′ = 1246′ (which equals roughly 35 yards of ribbon… it’s always good to get a couple extra yards for good measure) You’ll be working with a glue gun,so it’s a good idea to protect your work surface with newsprint or butcher paper before you begin. |
![]()
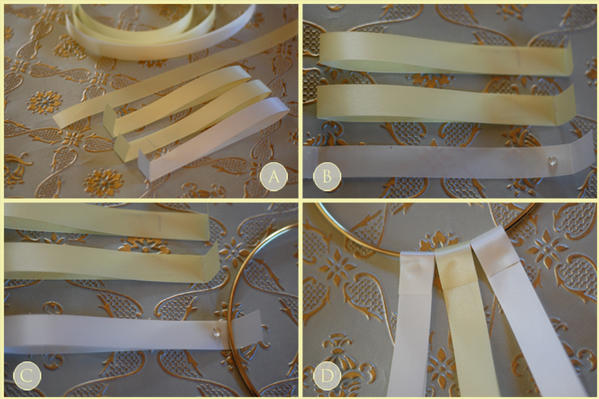
| Instructions: 1. Cut your ribbon into 14′ lengths. You can use one color, or multiple shades. I chose to use two colors; cream and butter yellow. 2. Lay one of your cut ribbon lengths horizontally down in front of you. Measure in 6.5 inches from the left side, fold here and crease. Fold the remaining inch of ribbon towards the left, and crease to make a loop. (see fig A) 3. Open up the loop, place a dot of glue just to the left of the crease at the 1′ mark, and fold closed leaving the 1′ tab free (see figure B) 4. Repeat steps 2 and 3 and fold enough loops for all three rings. 5. Place one of your loops under the ring, with the ring on the 1′ crease mark. Place a small dot of glue on the ribbon loop to the left of the ring, and fold the 1′ tab over the ring to secure. (see fig C and D) 6. Work your way around the ring, adding loops until it’s covered and you’ve created your first ‘cake layer’. Repeat the steps above and add loops to make the medium and large layers. |
![]()
 |
![]()
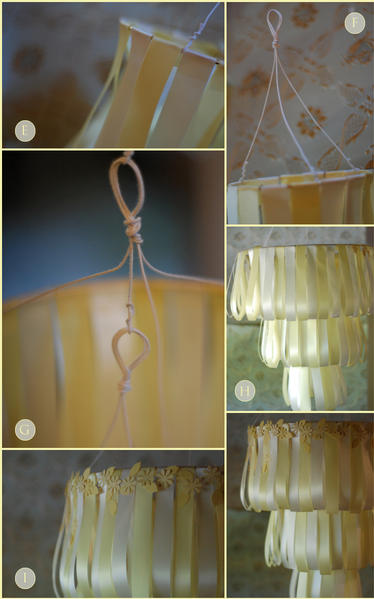
| 7. Take 3 strands of fabric coated wire and attach them to the ring of the smallest layer. Be sure they are evenly spaced around the ring. (see fig E) Join the wires and make a loop. Trim off the extra wire. (See fig. F) The distance between the top of the loop and top of the ring should be about 6′. 8. Repeat step 7 and make hangers for the medium and large layers. 9. Join the 3 layers using short sections of wire attached to the hanger loops. You’ll want the layers to overlap by at least an inch when they hang. Join the small and medium layers first, then attach them both to the large. 10. Find a place to hang your cake. It’s easier to complete the last step if your hands are free. 11. Punch out several paper flowers and leaves. Attach them randomly along the top of the large cake layer using your hot glue gun. (see fig I) |
![]()
 |
![]()
 |
![]()
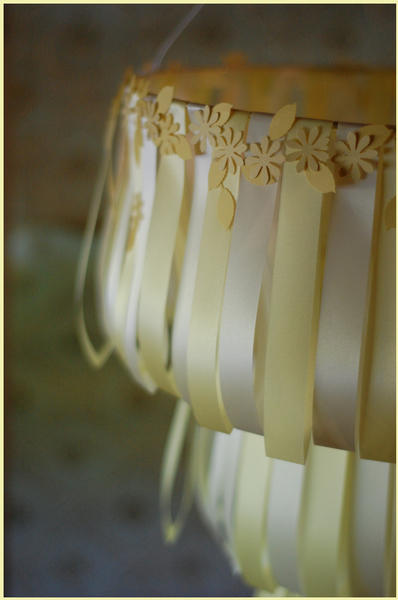
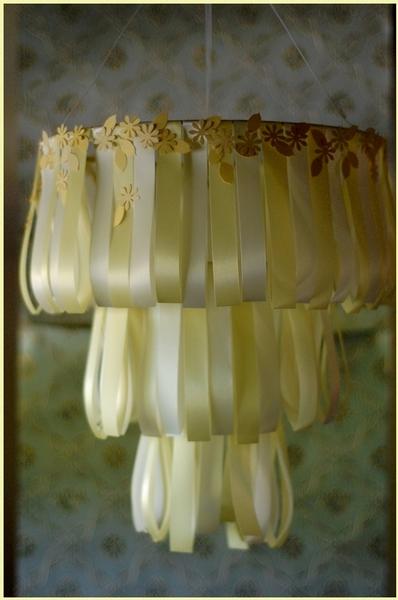
| 12. Display your Wedding Cake Chandelier at your wedding reception or bridal shower. |
![]()
 |
![]()
| You can make cakes with any number or size of layers and in any colors. Several cakes clustered together would make a lovely display above a dessert table. They are light weight, and very easy to hang.
These are not hard to make, but they do take time. It goes much faster if you have some extra helping hands. It’s a good project to do weeks before, not days before your wedding. |
![]()